Web Dashboard
The proxy server includes a dashboard at http://<proxy-ip>:3000 by default. It uses the same HTTP API as the terminal interface.
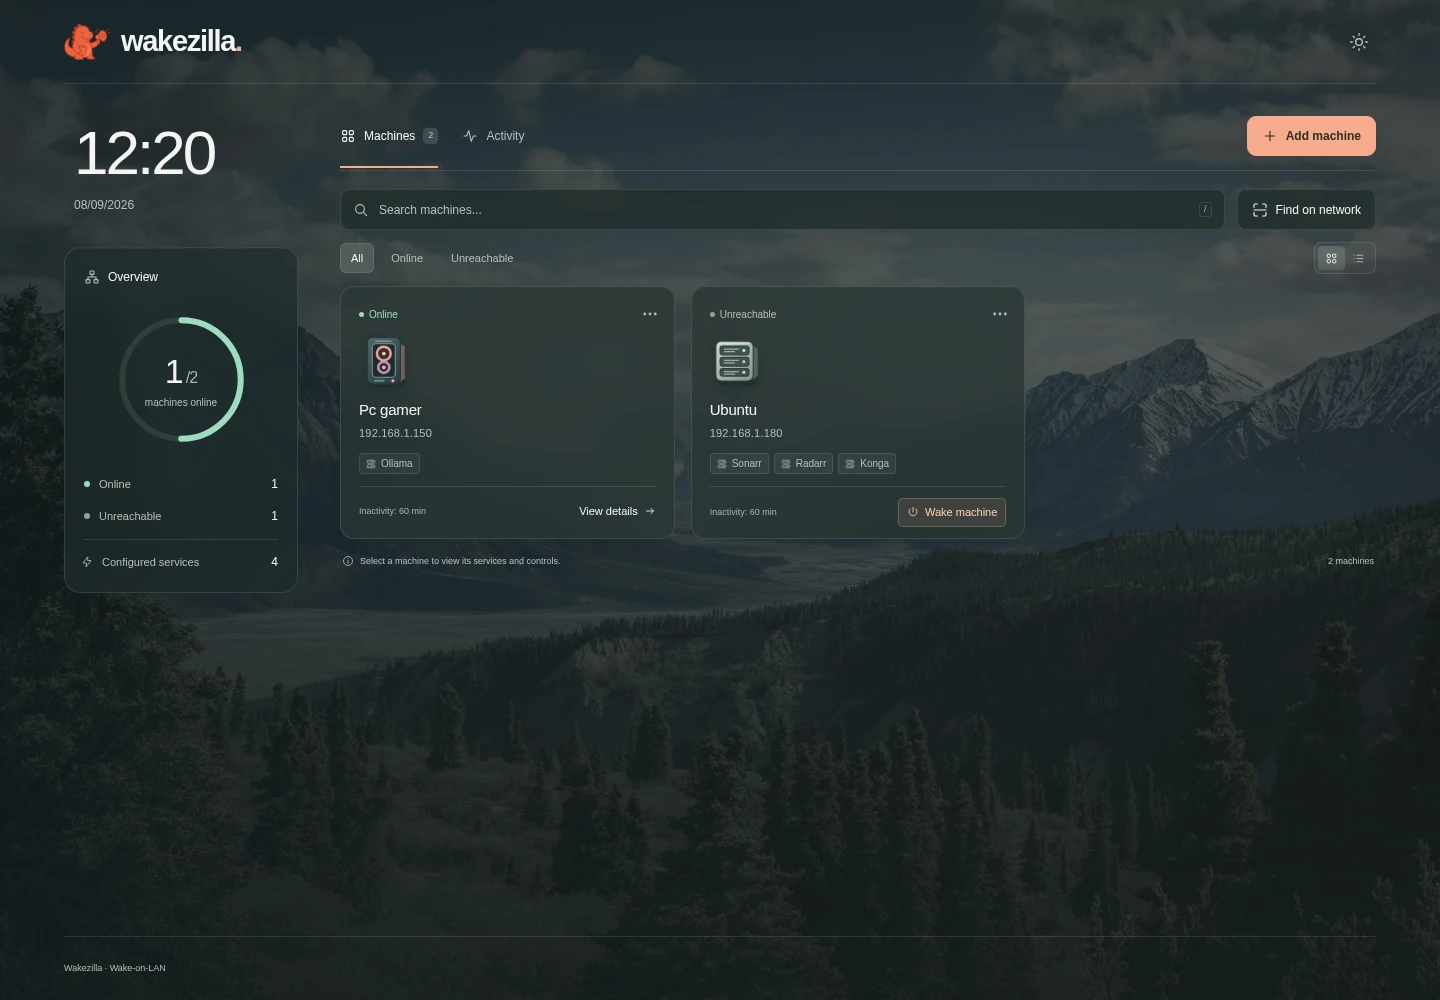
Find your machines
Section titled “Find your machines”The Machines tab shows registered machines in a grid or list. Search by machine name, IP address, or service, and use All, Online, or Unreachable to filter the results. Overview summarizes online machines and configured services.
Select a machine card, its name in the list, or View details to open its details window. The dashboard stays behind the window. Use Close window or Escape to return to the list.
Discover machines
Section titled “Discover machines”Choose Find on network to open Find your machines.
- Select the LAN interface that reaches the target machine, or use Automatic selection.
- Choose Find devices.
- Choose Add beside a discovered device. Registered devices show Already added.
- Verify the prefilled IP address, MAC address, and hostname-derived name.
Scanning requires raw-network access on Linux and macOS and is unavailable in Windows builds. See Network Scanner.
Register a machine
Section titled “Register a machine”Choose Add machine. The creation window accepts:
- a required name;
- a machine type, such as Server, NAS, Computer, Mini PC, Raspberry Pi, or Notebook;
- a required MAC address;
- a required IPv4 address;
- an optional description;
- optional services and their port forwards;
- client settings and the inactivity period.
The form starts without services. In Services and port forwarding, choose Add service and enter its Service name, Local port, and Target port. Repeat for more services, or use Remove service to discard a row.
Expand Client settings to configure Allow shutdown from the dashboard, Client port, and Inactivity (minutes). The default inactivity period is 60 minutes; it can be changed before saving. Use 0 to disable automatic shutdown without disabling wake or port forwarding.
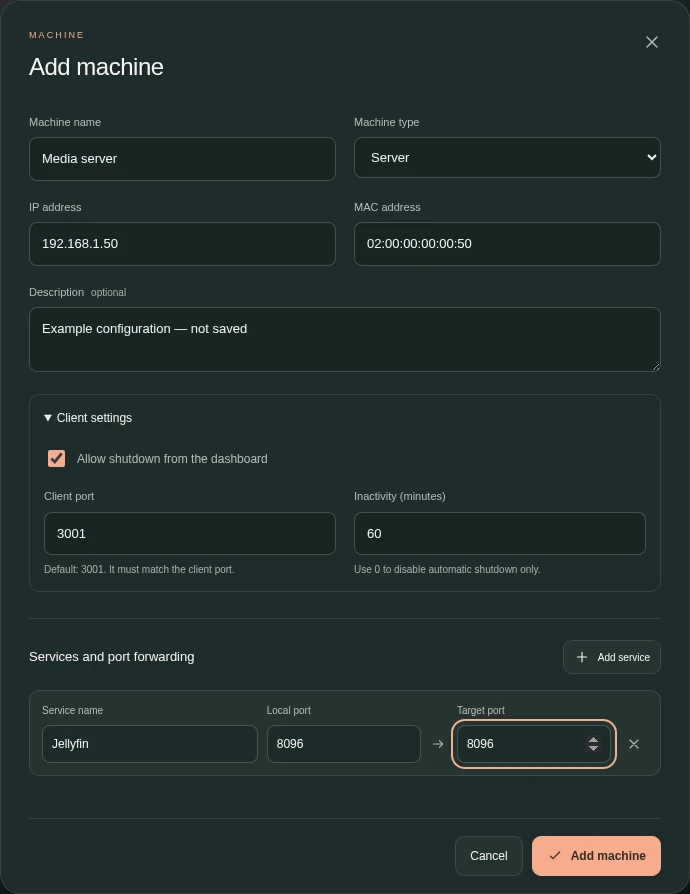
The image shows an unsaved example. Use your target’s actual IP address and Wake-on-LAN MAC address.
Choose Add machine to save. If dashboard shutdown is enabled, the window moves to Set up your machine so you can pair the target client. Otherwise, it stays on the saved machine’s details.
Machine status
Section titled “Machine status”Edit a machine
Section titled “Edit a machine”The details window lets you change the machine identity, type, description, client settings, services, and inactivity period. Choose Save changes to apply the form. Saving a change stops the old forwarders, starts the new configuration, and restarts the inactivity monitor.
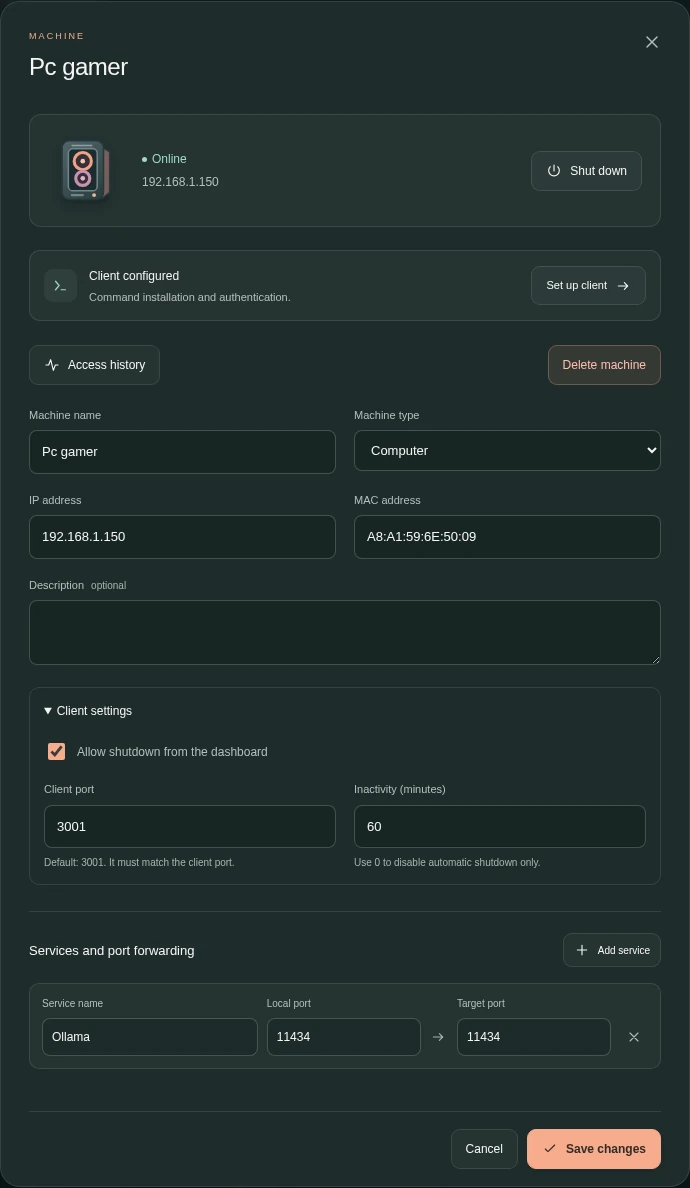
Keep the MAC address unique and use the interface configured for Wake-on-LAN. Cancel closes the form without saving your edits.
Delete machine opens a separate confirmation. Deleting a record removes it and its forwarding rules; it does not shut down the target.
Remote controls
Section titled “Remote controls”Wake machine sends the configured number of magic packets immediately. It does not wait for the machine to become reachable.
Choose Set up client in the details window to open Set up your machine. For a client that still needs pairing, select Linux / macOS or Windows and complete the two steps:
- Install Wakezilla on the target, if needed.
- Run the generated
wakezilla setup --mode client --key ...command with administrator privileges.
Use Copy beside each command. Check connection requests verification; the window also checks automatically while setup is pending. Set up later closes the window so you can return to it from the machine’s details.
After verification, the setup window shows Client configured. When the client is also reachable, Shut down opens a confirmation; Shut down machine sends the request. Legacy clients retain remote shutdown while they are migrated.
For an already configured or legacy client, Set up client again opens a key-rotation confirmation. Generate new key replaces the current key. Do not use it just to inspect setup: the target must be configured again after rotation.
See Secure Shutdown for the pairing flow and Platform Behavior for the action performed on each operating system.
Access history
Section titled “Access history”Choose Access history in a machine’s details. Use Hour, Day, or Week to group accepted proxy connections. Stack services changes how the series are displayed, and Refresh history fetches the latest records. Back to machine returns to the settings.
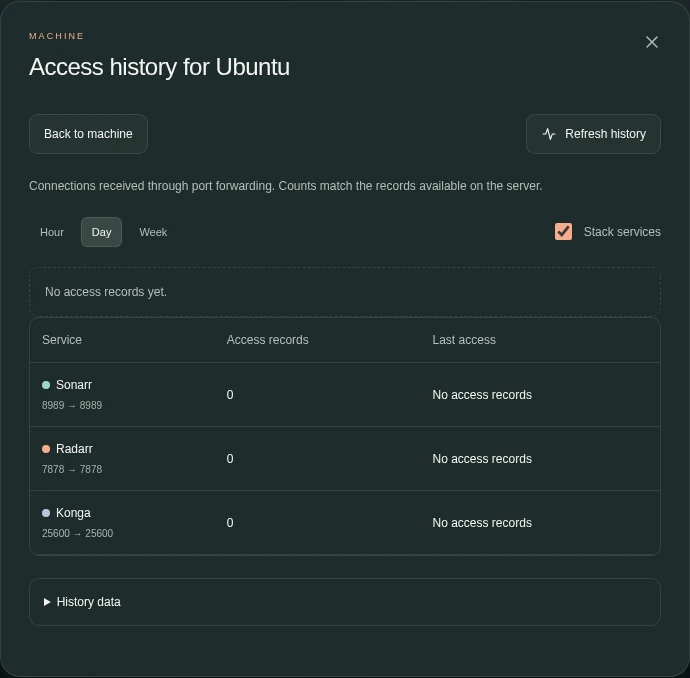
This example has no recorded connections yet. The service totals and chart reflect the records available on the proxy; no example traffic was generated for the screenshot.
Session activity
Section titled “Session activity”The dashboard’s Activity tab shows Recent events from the current browser session, such as actions performed in that dashboard. It is separate from the persisted per-service Access history. An empty activity tab does not mean the proxy has no recorded traffic.