Network Scanner
The dashboard scanner sends ARP requests on a local interface, resolves hostnames when possible, and returns IP and MAC addresses that can prefill the machine form.
Prerequisites
Section titled “Prerequisites”- Run the proxy on Linux or macOS.
- Use a network interface with an IPv4 address and a MAC address.
- Grant the process permission to create raw network sockets.
- Scan only networks you own or are authorized to administer.
Windows builds do not currently include the ARP scanner. Register machines manually on Windows.
Scan an interface
Section titled “Scan an interface”- Open the dashboard and choose Find on network.
- In Find your machines, choose a named Network interface, such as
en0oreth1, or use Automatic selection. - Choose Find devices.
- Wait approximately five seconds for ARP replies and hostname lookups.
- Choose Add beside a result to prefill the registration form. Existing records show Already added.
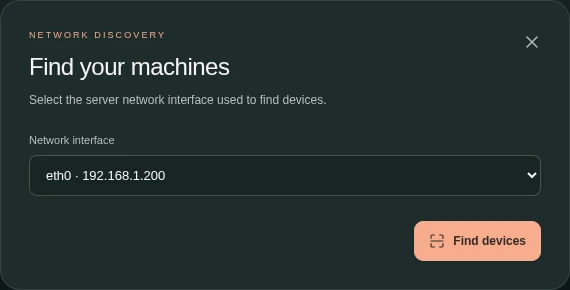
Auto-detection prefers an active, non-loopback IPv4 interface with a MAC address. It attempts to avoid common Docker bridge interfaces.
Verify discovered data
Section titled “Verify discovered data”ARP discovery reflects the current local network state. Before saving:
- confirm that the MAC belongs to the interface configured for Wake-on-LAN;
- use a DHCP reservation or stable IP address;
- replace an unhelpful hostname with a clear machine name;
- confirm that the selected interface reaches the same broadcast domain as the target.
Troubleshooting
Section titled “Troubleshooting”Permission denied
Section titled “Permission denied”Run the proxy with the privileges required for raw sockets. A service installed by wakezilla setup has system-level privileges, but a foreground process may need sudo on Linux or macOS.
No suitable interface
Section titled “No suitable interface”Confirm that the interface is up, is not loopback, has an IPv4 address, and exposes a MAC address. Select it explicitly instead of using auto-detection.
Empty results
Section titled “Empty results”ARP cannot discover devices across routed networks or most VLAN boundaries. Run the scanner on the target LAN, then register missing machines manually.