Quick Start
The fastest way to start Wakezilla is to configure the proxy with wakezilla setup, register the target in the dashboard, and run the generated secure client command. The setup process writes the system configuration, installs a boot-time service, starts it, and checks that its port is reachable.
What you need
Section titled “What you need”- Wakezilla installed on the proxy and target machines;
- administrator access on both machines;
- the target machine’s IP address and Wake-on-LAN MAC address;
- one target service to forward, such as a media server on TCP
8096.
1. Configure the proxy service
Section titled “1. Configure the proxy service”On the machine that will stay online and receive incoming traffic, run:
sudo wakezilla setupOn Windows, open PowerShell as Administrator and run wakezilla setup without sudo.
Choose Proxy server with the arrow keys or press 1, then press Enter.
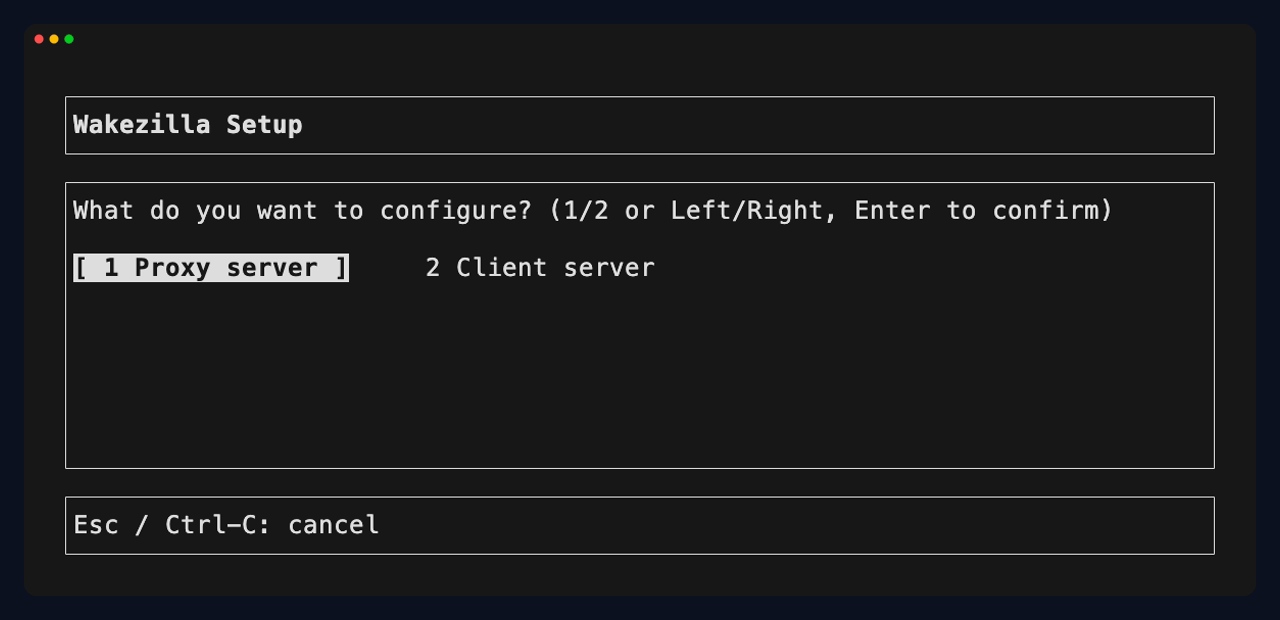
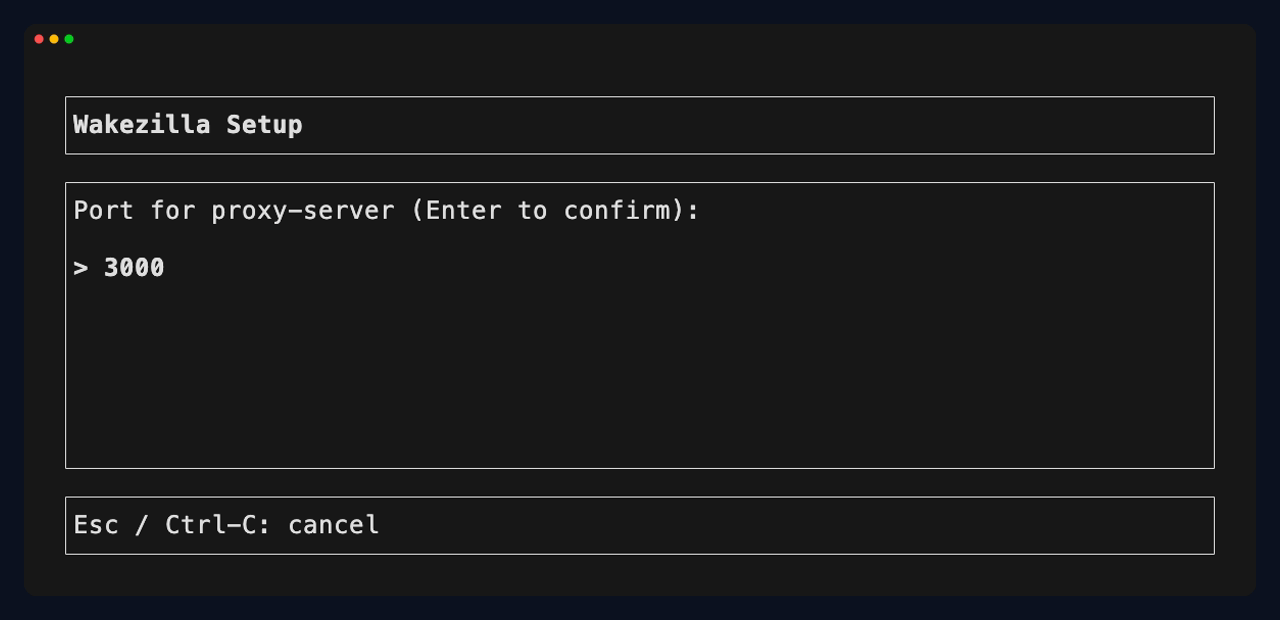
Keep the default proxy port 3000 for this guide. The current dashboard uses same-origin /api requests. If you change the configured listener or use a reverse proxy, serve the dashboard and its /api routes together. See Known Limitations for server configuration caveats.
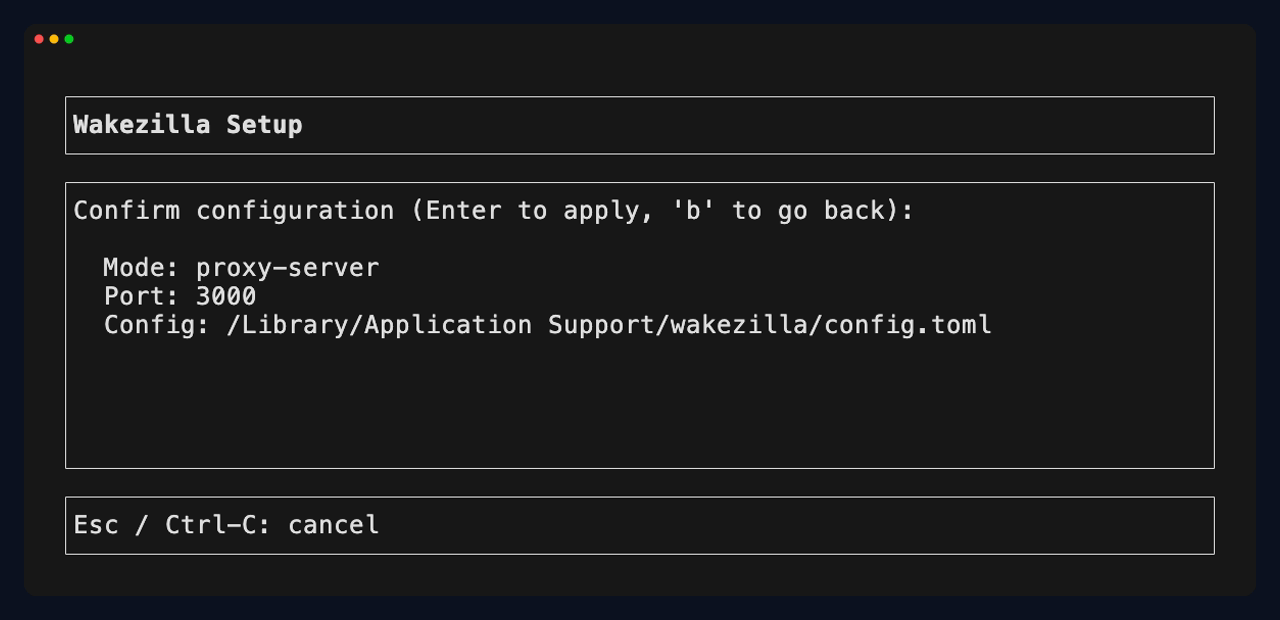
Review the selected mode, port, and configuration path. Press Enter to install and start the service. The path shown below is from macOS; Linux and Windows use their platform-specific system paths.
2. Verify the proxy
Section titled “2. Verify the proxy”Check the service from the proxy machine:
sudo wakezilla service status --mode proxyOn Windows, run the command from an elevated PowerShell without sudo.
Open http://<proxy-ip>:3000. The dashboard should load before you continue.
3. Install Wakezilla on the target
Section titled “3. Install Wakezilla on the target”On Linux or macOS, run:
curl -fsSL https://wakezilla.dev/install.sh | shOn Windows, open PowerShell as Administrator and run:
irm https://wakezilla.dev/install.ps1 | iexDo not configure the client service yet. The dashboard will generate a per-machine key and the complete command after you register the target.
4. Register the target machine
Section titled “4. Register the target machine”In the proxy dashboard, choose Add machine, or use Find on network to discover a target. Enter:
- a recognizable name;
- the target machine’s IP address;
- its Wake-on-LAN MAC address;
- a machine type that identifies the hardware.
Expand Client settings. Enable Allow shutdown from the dashboard, keep Client port at 3001, and set Inactivity (minutes) to 60.
The form starts without services. Under Services and port forwarding, choose Add service and enter:
- Service name: an optional label such as
media; - Local port: the port accepted by the proxy, such as
8096; - Target port: the service port on the target machine, such as
8096.
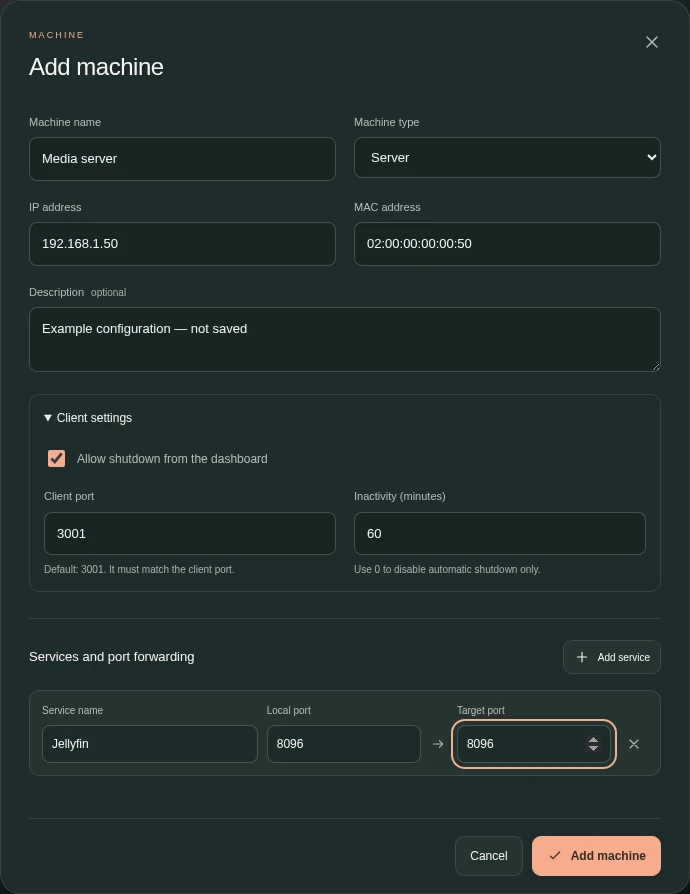
Use your actual target addresses, then choose Add machine to save. With dashboard shutdown enabled, the window moves to Set up your machine.
5. Pair the target client
Section titled “5. Pair the target client”Select Linux / macOS or Windows in Set up your machine. The window generates the complete configuration command, including the machine’s shutdown key. You do not need to create, type, or replace the key manually.
Since Wakezilla is already installed, choose Copy beside 2. Set up the client and run the command on the target with administrator privileges. On Windows, use PowerShell as Administrator.
Leave the setup window open for automatic verification, or choose Check connection. When the client is paired, it shows Client configured. Allow TCP 3001 only between the proxy and target.
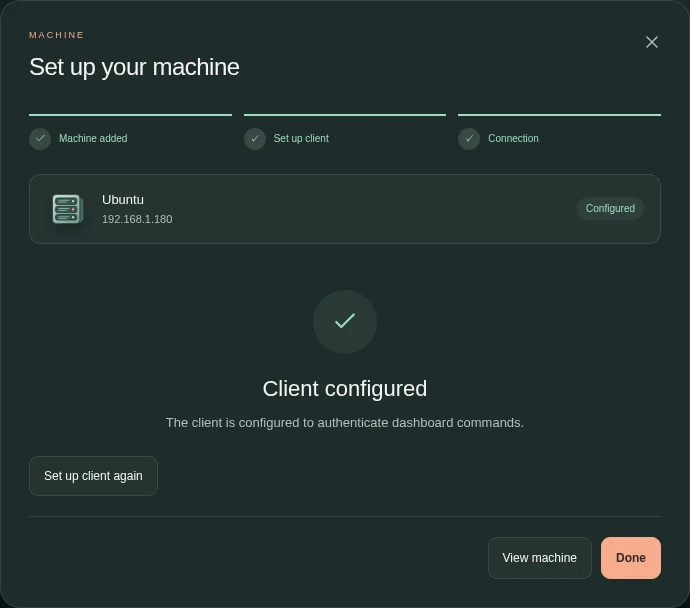
This screenshot shows an existing, verified client. Setup commands are only shown while pairing is needed. Use View machine or Done to leave this screen. If you chose Set up later, reopen the machine and select Set up client to continue.
See Secure Shutdown for verification states, legacy migration, key rotation, and troubleshooting.
6. Use the tray on a graphical desktop
Section titled “6. Use the tray on a graphical desktop”Release installers include the Wakezilla tray application. When a graphical desktop session is available, the installer requests an immediate tray launch or configures it for the next graphical login.

If the icon is not already visible, start it manually:
wakezilla trayThe tray can open or copy the dashboard URL, show proxy and client status, control installed services, open logs, check for updates, and configure startup.
See Desktop Tray for the complete menu and platform requirements.
7. Confirm the inactivity period
Section titled “7. Confirm the inactivity period”Open the machine’s details and expand Client settings. Confirm that Inactivity (minutes) is 60, then choose Save changes if you modify it. This setting is also available during creation. A value of 0 disables automatic shutdown.
8. Send traffic through Wakezilla
Section titled “8. Send traffic through Wakezilla”Connect to <proxy-ip>:8096. If the target is sleeping, Wakezilla sends the wake packet and waits for the service. It then forwards the request to the target and forwards the response back to the caller.
The TCP stream remains bidirectional for the life of the connection. Each newly accepted connection resets the inactivity timer. When no new connection arrives for 60 minutes, Wakezilla asks the target’s client to perform its platform power action.
What you built
Section titled “What you built”The proxy and client now start automatically with the operating system. A connection to the proxy wakes the target when required, carries traffic in both directions, and lets Wakezilla return the target to its platform power state after 60 minutes without a new connection.
Continue with Web Dashboard for machine management or System Services for service controls and logs. Before allowing another host to connect, read Security.